
Gimp: tingere i capelli - come funziona
GIMP è un editor di immagini molto esteso che puoi usare per tingere i capelli. Questo suggerimento pratico fornisce le istruzioni.
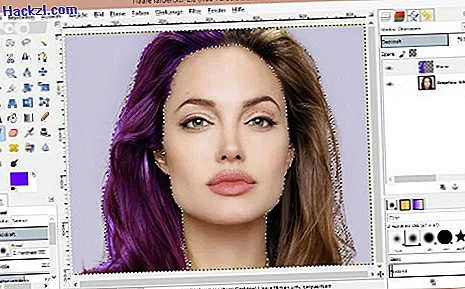
GIMP: capelli tinti
Con il programma gratuito "GIMP" puoi persino cambiare il colore dei capelli con gli strumenti appropriati. Ecco come funziona:
- Importa immagine: in GIMP fai clic su "File" -> "Apri ..." e seleziona la tua immagine.
- Segna i capelli: ci sono diversi modi per selezionare i capelli. Puoi usare la bacchetta magica o creare un percorso. La bacchetta magica si trova nella barra degli strumenti a sinistra. Il programma riconosce automaticamente sezioni di colore simili nell'area. In alternativa, puoi anche creare un percorso intorno ai capelli. Per fare ciò, fai clic su "Percorsi" nella barra degli strumenti e imposta i punti di ancoraggio attorno ai capelli. Infine, fai clic su "Selezione dal percorso" a sinistra.
- Nuovo livello: ora crea un nuovo livello nella barra dei menu in "Livello" -> "Nuovo livello ...". Dai un nome al livello. Il "tipo di riempimento livello" deve essere impostato su "trasparenza". Per rendere visibile il colore sull'immagine, devi sovrapporre questo livello. Per fare ciò, selezionare la modalità "Sovrapposizione" nella finestra del livello destro.
- Colore: ora entra in gioco il colore. Scegli un colore di primo piano adatto e dipingi i capelli con il pennello. Puoi anche tingere tutti i capelli contemporaneamente con lo strumento "Riempi". Se il colore è troppo forte per te, riduci l'opacità del livello a destra.
Leggi anche come ritagliare oggetti in GIMP.