
Installa Ubuntu su Wii: ecco come
"Come si installa Ubuntu sul Wii?" - Al più tardi da quando Nintendo ha interrotto il supporto per Nintendo Wii con il rilascio di Wii U, sempre più proprietari di Wii si chiedono come il Wii possa essere utilizzato in altri modi. In questo suggerimento pratico ti mostreremo come trasformare il tuo Nintendo Wii in un PC Linux veloce.
Usa Ubuntu su Wii: hai bisogno di questo accessorio
Per utilizzare Ubuntu su Wii, sono necessari i seguenti accessori.
- Una tastiera USB.
- Una chiavetta USB con almeno 4 GB di spazio di archiviazione.
- Una scheda SD (o scheda MicroSD con adattatore) con almeno 4 GB di spazio di archiviazione.
Ubuntu per Wii: i preparativi
Prima di installare Ubuntu su Wii, devi fare un po 'di preparazione.
- Avvia il tuo Wii e vai su "Opzioni Wii" in basso a sinistra.
- Quindi fai clic su "Impostazioni Wii".
- Quindi annota il numero di versione in alto a destra. Nel nostro caso è "4.3E".
- Quindi scorrere una pagina e fare clic su "Internet".
- Quindi seleziona "Informazioni console" e scrivi l'indirizzo Mac del tuo Wii.
- Assicurati anche che il tuo Wii sia connesso a Internet tramite WiFi. Puoi quindi spegnere di nuovo il tuo Wii.
Nintendo Wii: LetterBomb
Successivamente è necessario scaricare LetterBomb per Wii.
- Vai alla homepage di LetterBomb e seleziona qui la versione del tuo sistema operativo.
- Quindi inserisci il tuo indirizzo Mac e seleziona "Bundle the HackMii Installer for me!".
- Infine, fai clic su "Taglia il filo rosso". Quindi viene scaricato un file ZIP.
- Estrarre questo file ZIP e selezionare la scheda SD come cartella di destinazione. Avresti dovuto formattarli in precedenza con FAT32.
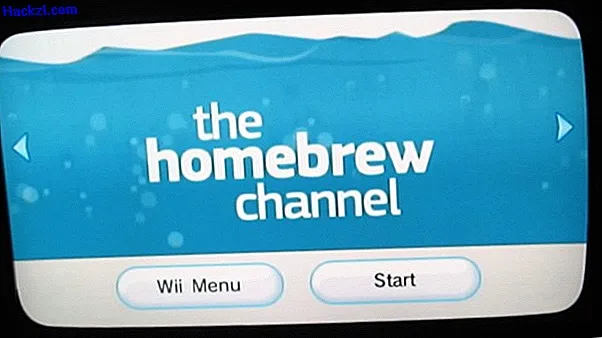
Installa il canale homebrew sul Wii
Quindi, inserisci la tua scheda SD nel Wii e avviala.
- In basso a destra dovresti vedere un nuovo messaggio nella posta in arrivo con una busta rossa.
- Fai clic sulla busta con il pulsante A sul tuo Wiimote.
- Quindi premere il pulsante "1" sul telecomando Wii.
- Usa i tasti freccia (sul tuo Wiimote) per navigare fino a "Continua" e premi "A".
- Quindi vai su "Installa il canale Homebrew" e su "Sì, continua". Quindi viene installato il canale homebrew.
- Quindi fare di nuovo clic su "Continua" e su "Esci".
- Ora dovrebbe iniziare il canale homebrew. Premi il tasto Home sul telecomando Wii e fai clic su "Esci dal menu di sistema". Puoi quindi spegnere di nuovo il tuo Wii.
Ubuntu per Wii: hai bisogno di questi file
Il prossimo passo è trovare i file giusti per la tua installazione di Ubuntu.
- Innanzitutto è necessario un programma di installazione in grado di installare un kernel Linux. A questo punto usiamo il "Whiite Linux Installer (Beta 1)", che puoi scaricare dalla homepage di GameCube Linux.
- Estrai questo programma di installazione e scegli la tua scheda SD come percorso di destinazione. È importante averli riformattati in anticipo con FAT32.
- Successivamente è necessaria una distribuzione adeguata. In questo articolo, elenchiamo la nostra top 10. La pagina di download di GC Linux e la homepage di WiiBrew sono molto pratici. A questo punto stiamo usando una distribuzione Ubuntu per Wii.
- Estrai anche questo file e seleziona la tua chiavetta USB come percorso target. Questo dovrebbe anche essere completamente vuoto e nuovamente formattato con FAT32.
Installa Ubuntu su Wii
Dopo aver completato tutti i passaggi precedenti, ora puoi finalmente installare Ubuntu su Wii.
- Inserisci la tua scheda SD, la chiavetta USB e la tastiera USB nella tua Wii e avviala.
- Quindi aprire il canale homebrew, fare clic su "Programma di installazione whiite-linux (B1)" e su "Carica".
- Quindi utilizzare i tasti freccia sulla tastiera per passare a "Sì" e premere il tasto Invio.
- Quindi tornare di nuovo a "Sì", "OK" e "Sì". Ubuntu verrà ora installato. Questo processo dura circa due ore. Dopo poco tempo, lo screen saver si attiva e lo schermo diventa nero. Per attivare lo schermo, basta premere Invio una volta.
- Quando viene visualizzato il messaggio che Ubuntu è stato installato correttamente, premi di nuovo Invio per riavviare Wii.
Avvia Ubuntu su Wii
Al termine dell'installazione, ora puoi avviare Ubuntu.
- Per fare ciò, apri il canale homebrew, fai clic su "Ubuntu Wii" e su "Carica". Quindi si avvia Ubuntu.
- Con il pulsante A sul Wiimote fai un clic sinistro e con il pulsante B fai clic destro.
- Suggerimento: se desideri anche navigare in Internet con Ubuntu, devi prima avviare lo strumento di configurazione WLAN con il comando "sudo ~ / whiite-ez-wifi-config" (senza virgolette).

Nel video: Ubuntu per lo smartphone.
Il prossimo suggerimento pratico ti spiegherà come installare la distribuzione Linux "Fedora" in VirtualBox.