
Tutorial iMovie: tagliare un film - una guida rapida
Modificare un film in iMovie non è affatto difficile. In questo tutorial, ti mostreremo come tagliare facilmente i video e modificare le transizioni.
Piccolo tutorial: tagliare film e video in iMovie
Prima di poter iniziare, devi avviare iMovie. I singoli passaggi necessari per l'editing video sono disponibili anche nella galleria di immagini.
- Fai clic su "File" e poi su "Nuovo film ...". Ora seleziona un argomento nella nuova finestra e dai un nome al progetto.
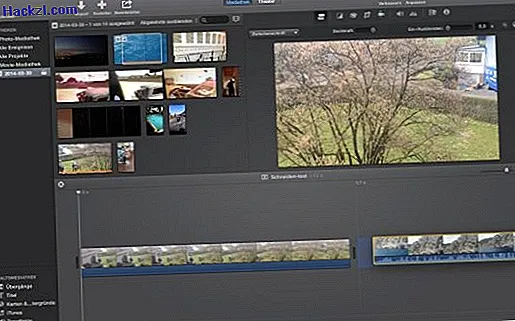
- La metà superiore ora mostra tutti i video importati. Seleziona un video o una sezione con il tasto sinistro del mouse e aggiungilo al tuo progetto nella metà inferiore trascinandolo.
- Puoi anche contrassegnare e salvare solo una parte di un video con il pulsante del mouse e aggiungerlo al video. In questo modo è possibile dividere i video in singole sezioni e rimontarli.
- Ora seleziona un secondo video o una sezione video e aggiungilo al tuo progetto come descritto al passaggio 2. Inserisci il secondo video dopo il primo video.
- Ora fai clic su "Transizioni" nell'angolo in basso a sinistra e seleziona una transizione. Quindi trascinalo e rilascialo tra i due video.
- Se si preme la [barra spaziatrice], è possibile guardare il video modificato.
In alternativa alla modifica, puoi anche aggiungere un effetto immagine nell'immagine in iMovie.
Ultimi video
Per prima cosa crea un nuovo progetto facendo clic su "File" e poi su "Nuovo film
".
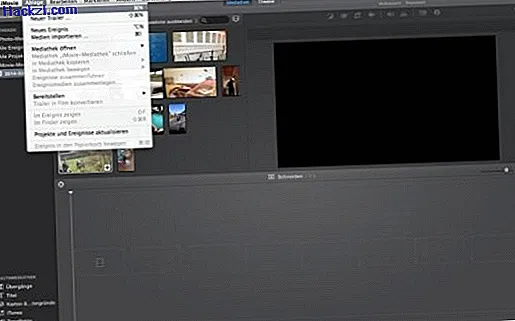
Seleziona un argomento qui e dai un nome al film.

Contrassegna un video importato in precedenza con il pulsante sinistro del mouse e aggiungilo al tuo film. Puoi anche inserire solo una parte del video tenendo premuto il pulsante del mouse.

Aggiungi un altro video come descritto nella figura sopra.
Ora fai clic su "Transizioni" in basso a sinistra.

Ora puoi trascinare e rilasciare qualsiasi transizione tra i tuoi video usando il trascinamento della selezione.
